Teeth whitening is one of the most popular cosmetic dental treatments. Over time, our teeth can become stained due to various factors like coffee, tea, tobacco, or aging. Fortunately, teeth whitening gel offers a safe and effective solution to brighten your smile without visiting the dentist. In this guide, we’ll take you through a detailed, step-by-step tutorial on how to use teeth whitening gel at home, ensuring you get the best results.
What is Teeth Whitening Gel?
Teeth whitening gel is a product that is typically used to lighten the color of your teeth. It contains active ingredients such as hydrogen peroxide or carbamide peroxide. These ingredients break down stains on your teeth, resulting in a whiter smile. Many products are available in the market, ranging from over-the-counter gels to dentist-prescribed options.
The benefit of using teeth whitening gel at home is that it is cost-effective and convenient. The process is straightforward, and with proper care, you can achieve noticeable results in a few weeks.
Types of Teeth Whitening Gels
Before we dive into how to use teeth whitening gel, it’s important to understand the different types available. There are two primary types of whitening gels:
1. Whitening Gel with a Tray
This type of whitening gel comes with a custom or universal mouth tray. You apply the gel to the tray and wear it on your teeth for a specified amount of time.
2. Whitening Gel with Strips
These are pre-filled strips with whitening gel. You simply place the strips on your teeth for a set period, and the gel works to whiten your teeth.
Both types can be effective, but trays may provide more consistent results, especially if they are custom-fitted.
How to Choose the Right Teeth Whitening Gel
When choosing a teeth whitening gel, you should consider the following factors:
Strength of the Gel: Over-the-counter gels usually contain lower concentrations of peroxide, while dentist-prescribed gels have higher concentrations for faster results.
Sensitivity: Some gels are designed to minimize tooth sensitivity, which can be a side effect of whitening.
Application Method: Choose a gel that suits your comfort level, whether it’s in a tray or strip format.
Ingredients: Ensure the gel contains safe and effective whitening agents, such as hydrogen peroxide or carbamide peroxide.
Now, let’s move on to the step-by-step process of using teeth whitening gel at home.
Step 1: Prepare Your Teeth
Before applying the whitening gel, it’s essential to clean your teeth thoroughly. This ensures that there is no plaque or food residue that could interfere with the whitening process.
Brush Your Teeth: Use a soft-bristled toothbrush and fluoride toothpaste. Brush for at least two minutes to remove surface plaque.
Floss: Flossing helps to clean between your teeth, ensuring the whitening gel can reach all surfaces.
Rinse Your Mouth: After brushing and flossing, rinse your mouth with water or a mouthwash. This step ensures your teeth are clean and ready for the gel.
Step 2: Choose the Right Tray or Strip
If you’re using a whitening gel with a tray, follow these steps:
Fit the Tray: If you have a custom tray, it should fit snugly over your teeth. If you’re using a universal tray, ensure that it covers all your teeth comfortably without gaps.
Fill the Tray: Squeeze a small amount of whitening gel into each compartment of the tray. Be sure not to use too much, as excess gel can leak out and cause gum irritation.
If Using Strips: Simply peel the backing from the strips and apply them to your teeth. Align the strip with your gum line and press it gently into place.
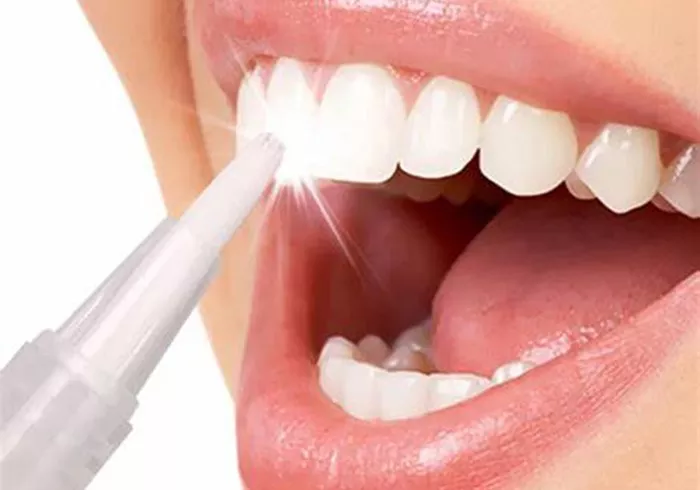
Step 3: Apply the Gel
Now that your tray or strips are ready, it’s time to apply the gel to your teeth.
Tray Application: Place the tray over your teeth and press gently. Be careful not to move it too much to prevent the gel from spilling over onto your gums. If you notice any excess gel, use a clean finger or tissue to wipe it away.
Strip Application: Once the strips are placed on your teeth, make sure they are secure. If you are using a whitening strip, make sure it covers the front of your teeth entirely.
Step 4: Wait the Recommended Time
Each whitening gel will come with specific instructions on how long to leave it on your teeth. This time can range from 15 minutes to an hour, depending on the strength of the gel.
Follow Instructions: Do not exceed the recommended time as overexposure can cause sensitivity or irritation to your gums.
Set a Timer: It’s easy to lose track of time, so set a timer to remind you when it’s time to remove the gel.
Step 5: Remove the Gel
After the recommended time has passed, remove the whitening gel. Here’s how you should do it:
Tray Users: Gently remove the tray from your mouth and rinse your teeth with water. Clean the tray thoroughly before storing it for the next use.
Strip Users: Carefully remove the strips from your teeth. Dispose of them and rinse your mouth with water.
Step 6: Clean and Care for Your Teeth
After using the whitening gel, it’s important to care for your teeth to ensure long-lasting results.
Brush Again: Use a soft toothbrush to gently brush away any remaining gel residue from your teeth.
Avoid Staining Foods: For at least 24 hours after whitening, try to avoid foods and drinks that can stain your teeth, such as coffee, tea, red wine, and tobacco.
Use a Toothpaste for Sensitive Teeth: If you experience any tooth sensitivity, switch to a toothpaste designed for sensitive teeth.
Step 7: Repeat the Process
Most whitening gels require multiple applications to achieve noticeable results. Follow the instructions on the product packaging, and typically, you can whiten your teeth every day or every other day for up to two weeks.
Tips for Using Teeth Whitening Gel at Home
To get the best results and ensure your safety, here are some additional tips:
1. Consult with Your Dentist
Before starting any whitening treatment, it’s a good idea to consult with your dentist, especially if you have sensitive teeth or dental work such as crowns or fillings.
2. Don’t Overuse the Gel
While it’s tempting to use the whitening gel every day, overuse can lead to tooth sensitivity or gum irritation. Stick to the recommended frequency for your specific product.
3. Maintain Regular Dental Hygiene
Regular brushing, flossing, and professional cleanings will help maintain your whitening results. Good oral hygiene is key to preventing stains from returning.
4. Choose a Safe Product
Not all teeth whitening gels are created equal. Opt for products that are approved by dental professionals or carry the ADA (American Dental Association) seal of approval.
5. Protect Your Gums
Some whitening gels can cause gum irritation. If this happens, use a smaller amount of gel or reduce the amount of time you leave the gel on your teeth.
How to Maintain Your White Smile
Once you’ve achieved your desired level of whiteness, it’s important to maintain your bright smile. Here are some ways to keep your teeth white:
Avoid Staining Foods: Coffee, tea, red wine, and dark sauces can stain your teeth over time. Drink plenty of water after consuming these beverages to minimize their staining effects.
Touch-Up Treatments: You may want to perform touch-up treatments every few months to keep your smile bright.
Regular Dental Visits: Professional cleanings every six months help maintain the appearance of your teeth.
Conclusion
Using teeth whitening gel at home is a convenient and cost-effective way to brighten your smile. By following the steps outlined in this guide, you can safely and effectively use teeth whitening gel to achieve a whiter, more confident smile. Always remember to follow the instructions carefully, and if you have any concerns, consult with your dentist before starting a whitening treatment.
Maintaining proper oral hygiene and using teeth whitening products as directed will help you get the most out of your whitening treatment. Keep in mind that results may vary depending on the type of gel and how often you use it. With patience and consistency, you’ll be able to enjoy a whiter, healthier-looking smile in no time.
Related topic:


